There’s something addictive about capturing galaxies, nebulae, and star clusters with your own gear. Buying an expensive ready-made setup is one route, but if you want more control, and to save money, building your own Deep-Sky Astrophotography Kit is the smarter choice. A DIY astrophotography setup not only teaches you the mechanics of imaging the night sky, it also lets you customize gear for your goals, whether that’s wide-field Milky Way shots or zooming in on faint deep-sky objects.
This guide cuts out the fluff and breaks down exactly what you need, how to put it together, and where to start if you’re working with beginner astro equipment or aiming for a budget deep-sky kit.
Don’t jump straight into buying gear. First ask: What do I want to shoot? If it’s bright targets like the Orion Nebula or Andromeda Galaxy, you can get away with a simpler setup. If you’re dreaming of faint galaxies, you’ll eventually need more advanced deep sky imaging gear. Defining your goal ensures you don’t waste money on tools that don’t fit your plans.
More to discover: Top Astronomy Tools Every Stargazer Needs

Every solid DIY astrophotography setup comes down to five essentials. Miss one and your results will suffer.
a) Astrophotography Star Tracker / Mount
The most critical part of your rig is the astrophotography star tracker or an equatorial mount. Without accurate tracking, your stars will trail, no matter how good the camera is. Entry-level options like the Sky-Watcher Star Adventurer or iOptron SkyGuider Pro are affordable, portable, and perfect for wide-field imaging. For heavier telescopes and longer exposures, equatorial mounts like the EQ6-R Pro give rock-solid performance.
b) Telescope or Lens
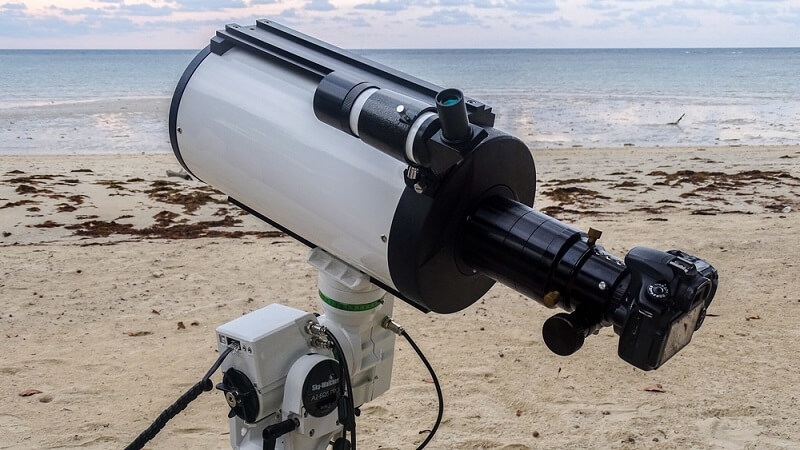
Your optical tube decides your view. Small refractors, such as the William Optics RedCat 51, are beginner-friendly and ideal for wide-field nebulae. But don’t overlook camera lenses you might already own—many astrophotographers start with a 135mm or 200mm lens and capture impressive results. This flexibility makes lenses a strong choice for a budget deep-sky kit.
Dive in Deeper: What You Need to Know About Telescope Eyepieces to Magnify
c) Imaging Camera
DSLRs and mirrorless cameras are excellent entry points. A Canon Rebel series body is cheap, reliable, and widely used in amateur astrophotography. Later, when you’re ready, you can upgrade to a dedicated astronomy camera like the ZWO ASI series for higher sensitivity and cooled performance. Both options have their place in a custom Deep-Sky Astrophotography Kit.
d) Mounting Accessories
Connecting your camera to your telescope requires a T-ring and T-adapter. They’re small, inexpensive, and crucial. Depending on your telescope, you may also need a field flattener or reducer to correct star shapes. Skipping this step can ruin hours of imaging.
e) Extra Gear for Better Images
The difference between average and excellent results often comes down to accessories. A guide scope with a small guide camera allows longer exposures with pinpoint stars. Filters help cut through light pollution, especially in urban skies. Don’t forget reliable power solutions—portable batteries or power banks keep your deep sky imaging gear running all night.
Let’s face it, cost is a big factor. Here are examples of practical builds at different price points.
Starter Budget Deep-Sky Kit (~$2,000)
This setup is light, portable, and proven to capture stunning nebulae and galaxies. It’s the perfect entry-level beginner astro equipment package.
Mid-Range DIY Build (~$2,600)
This combination takes your imaging to another level with automation, guiding, and better control. It’s more than just a budget deep-sky kit—it’s a system you can grow into without immediate upgrades.
Travel Kit
Want something portable? Pair a DSLR, a compact refractor or telephoto lens, and a lightweight astrophotography star tracker. This minimalistic setup is easy to carry to dark-sky sites and delivers incredible wide-field shots of the Milky Way, Orion, and more.
Owning a Deep-Sky Astrophotography Kit is only half the story. Execution matters just as much.
Setup and Alignment
Polar alignment is step one. Without it, tracking accuracy collapses. Mount your telescope, attach the camera, and carefully focus. Take your time—rushing this step guarantees blurry stars.
Capturing Exposures
Deep-sky imaging is about collecting light. Aim for multiple long exposures (2–3 minutes each) and build up hours of total data. Use autoguiding if your focal length requires it. Be sure to take calibration frames (bias, dark, and flat frames) to correct sensor noise.
Stacking and Processing
Noise reduction and detail enhancement can be achieved by combining your images with software such as DeepSkyStacker. Then, faint detail and color enhancement as well as contrast improvement can be done with Photoshop, PixInsight, or Siril. This is where the magic comes. Even with entry-level equipment, post-processing has the ability to turn raw frames into stunning astrophotos.
Explore More: The Essential Guide to Binoculars for Stargazing & Astronomy
Building your own Deep-Sky Astrophotography Kit isn’t just about saving money—it’s about control, customization, and the satisfaction of capturing the universe on your terms. Start with reliable beginner astro equipment, add a solid astrophotography star tracker, and grow your deep sky imaging gear step by step. Whether your aim is a budget deep-sky kit or a more advanced DIY build, the journey is just as rewarding as the final photo.
Once you’ve pieced together your setup, every clear night becomes an opportunity. And nothing compares to the first time you capture a nebula or galaxy with gear you built yourself.
This content was created by AI